Control panel guide
The control panel captures audio, configures translation, and manages what viewers see. The features below follow the order you would actually use them.
1. Open the control panel
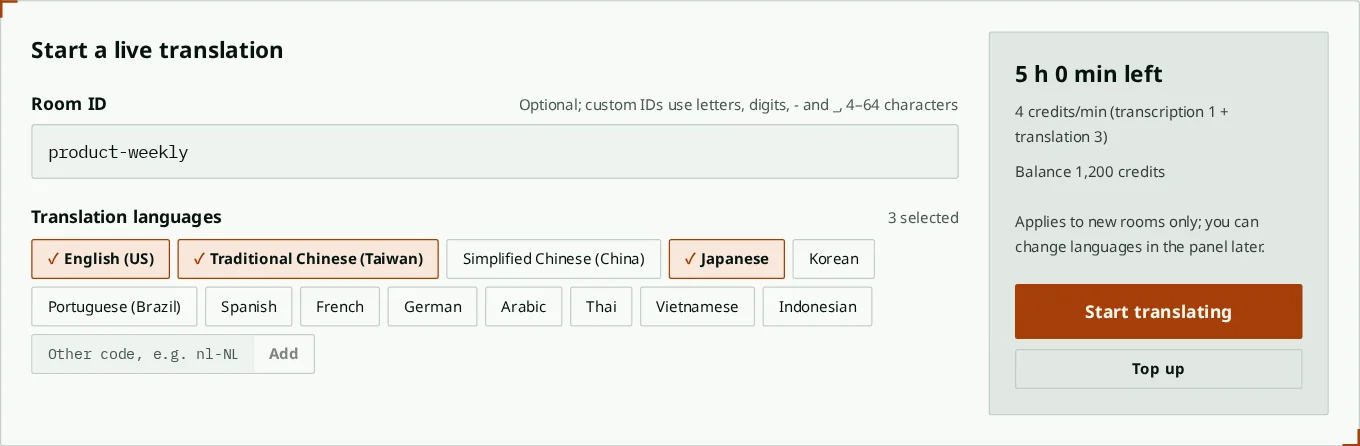
After signing in you land on “My sessions”. In “Start a live translation”, you can leave Room ID blank: the system then creates a short name that’s easy to read and type and never clashes with another room (for example k7mq-x4pz). It becomes part of the viewer link. To use your own name, type it in (letters, digits, - and _ only, 4–64 characters, for example weekly-meeting). Tick the languages you want translations in and press “Start translating”. The control panel opens.
Above the “Start translating” button you can see roughly how long your balance will last; press “Top up” to buy more. Rooms you opened before are listed further down; press “Open control panel” to open one again.
To open a new room, your account needs credits or an administrator has to enable it for you. Co-owners invited to help don’t need credits of their own.
2. Interface overview
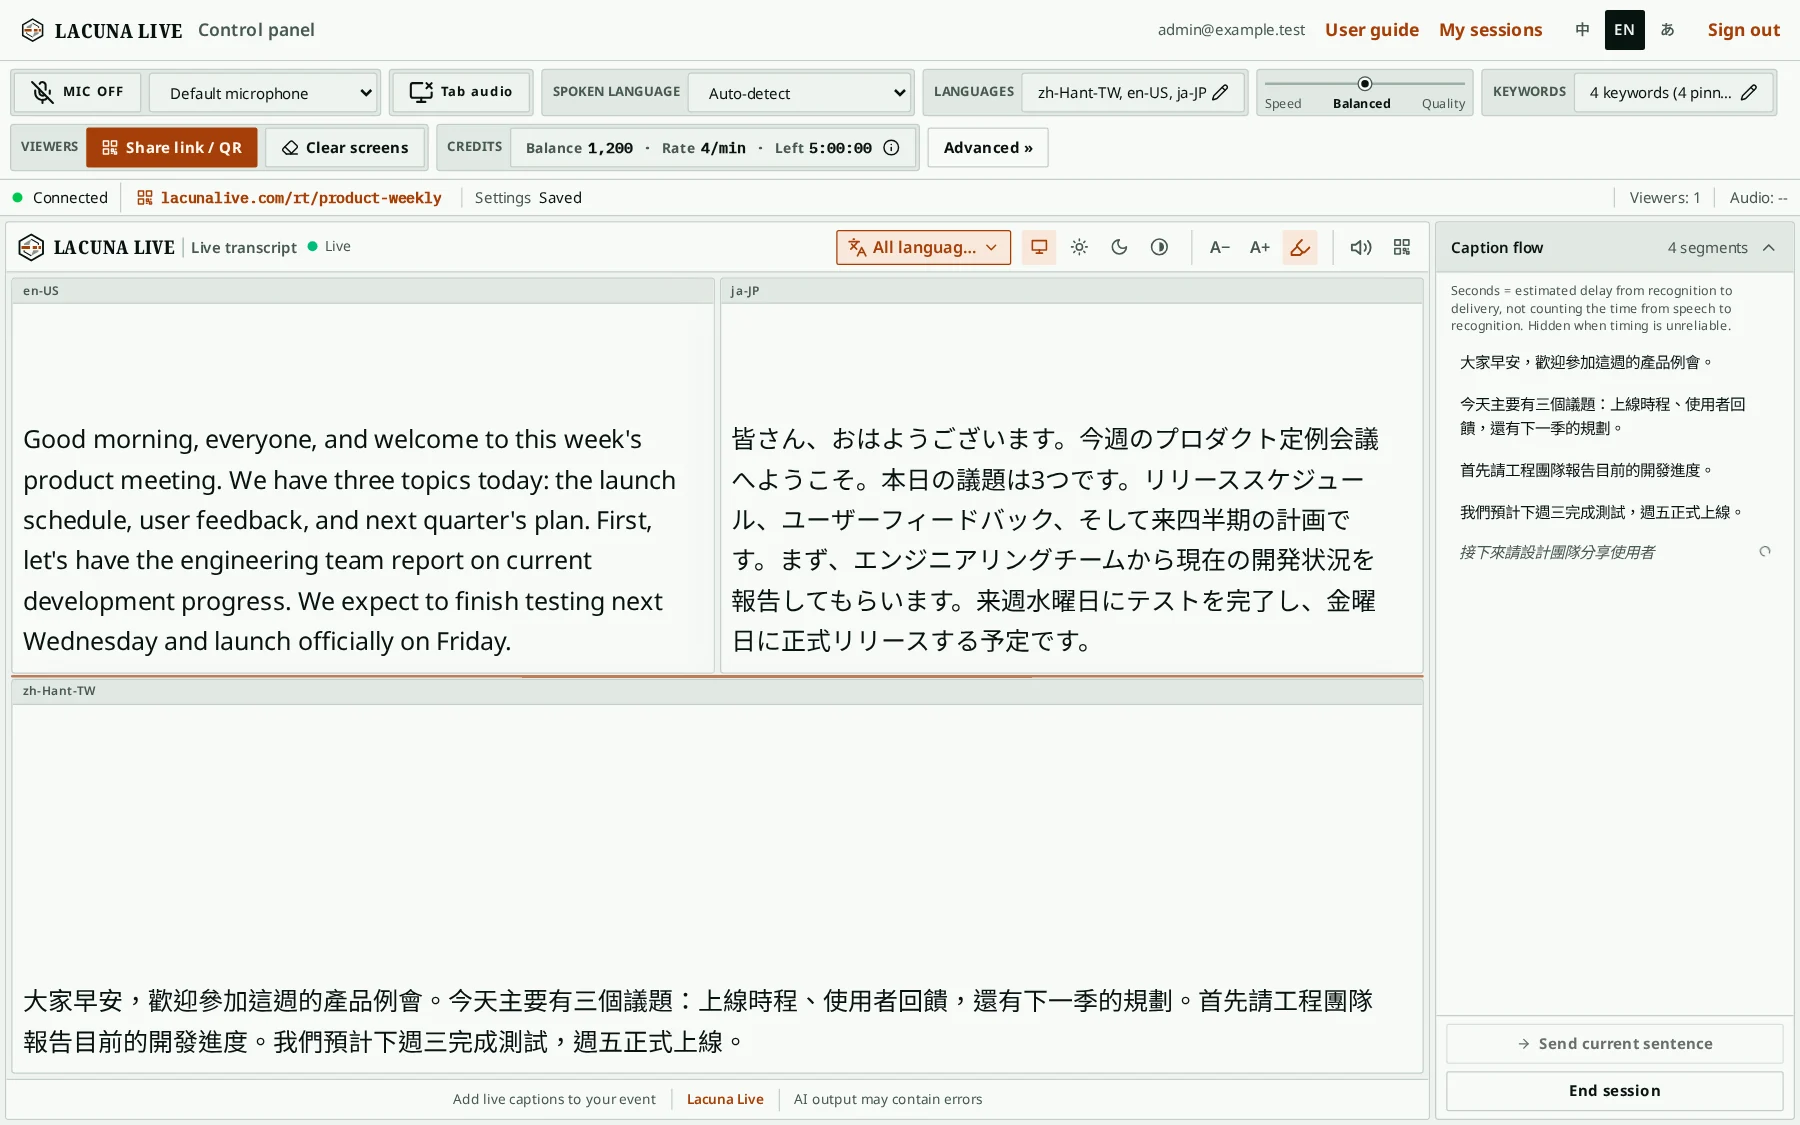
The control panel has three parts: the toolbar and status bar at the top, for the microphone and settings; a preview of what viewers see in the middle; and “Caption flow” on the right, listing each sentence the speaker said most recently. In a new room with no captions yet, Caption flow shows a “Get started” checklist: start capturing, share the link with viewers, and fix captions here.
3. Toolbar and status bar
Changes in the toolbar save automatically. Settings you need less often are hidden until you press “Advanced »”.
- MIC OFF / MIC ON
- Turns microphone capture on or off. Use the menu next to it to pick a microphone. On a phone, the status bar also has a round microphone button.
- Tab audio
- Captures another tab (an online meeting, YouTube, and so on) or system audio directly, on its own or together with the microphone. Only desktop Chrome and Edge show this button.
- Spoken language
- The language the speaker talks in. If unsure, leave it on “Auto-detect”.
- Translation preference
- The main toolbar slider has three stops: Speed, Balanced, and Quality. It affects text correction and translation, not audio capture or speech recognition. Drag to preview and release to save, or click a stop’s name. Speed prioritizes shorter caption delays; Balanced pairs fast correction with more refined translation; Quality prioritizes meaning, phrasing, and context. Unavailable options cannot be selected.
- Languages, Keywords
- Open their settings windows; see the sections below.
- Viewers
- “Share link / QR” shows the viewer link and QR code. “Clear screens” empties the current text on every viewer’s screen, and it stays gone when viewers refresh or reconnect; new captions show as usual. The saved transcript is not deleted and stays visible in the panel and History.
- Credits
- Shows your balance, how much this room uses per minute, and about how long you have left; click for details. Listening costs 1 credit per minute, plus 1 credit per minute for each translation language. While the microphone or tab audio is on, silence is charged too; both on together count once. You get a reminder at 5 minutes and at 1 minute left. If an administrator has given you free use, this spot shows the free period instead, and no credits are used during it.
- Room usage limits
- In the Credits details, the person who created the room can set a spending cap for it. When the cap is reached, listening stops; raise the cap and turn the microphone back on to continue.
- Speech recognition engine
- Turns speech into text and is separate from the translation preference in the main toolbar. The default is fine for most events. (Under “Advanced”)
- Dictionary, Tone
- Dictionary is explained below. Tone sets how translations sound: fluent, formal, casual, literal, or your own description. (Under “Advanced”)
- Co-owners
- Invite others to run the panel with you; see the last section. Only the room’s creator sees this. (Under “Advanced”)
- KEY
- This room’s control panel key. Click to copy it, and don’t share it publicly. (Under “Advanced”)
- Status bar
- Shows whether you’re connected, the viewer link, whether settings are saved, how many viewers are watching, and how much audio has been captured. Click the viewer link to open the share window, where you can copy the link or show its QR code; on a phone only the QR code icon shows.
- If something goes wrong
- If a service failure charged you credits by mistake, contact an administrator; they’ll refund it after checking. Refunds are not automatic.

4. Start listening
Press “MIC OFF” to start listening; the first time, your browser asks for permission to use the microphone. When the button reads “MIC ON”, the panel is listening, and the red inside the button moves with the volume. Once someone speaks, captions appear in the preview and in the caption flow.
Press the button again to stop. A half-finished sentence is sent when you stop.
Pressing “Tab audio” opens the browser’s share dialog: pick the tab to capture and tick “Share tab audio”; when sharing the entire screen, tick “Share system audio” (Windows and ChromeOS only). This needs desktop Chrome or Edge; Firefox and Safari cannot share audio. The microphone and tab audio can run together and are recognized as one mixed stream; wear headphones then, so the microphone does not pick up the speakers again. The browser’s “Stop sharing” button stops only tab audio; press “Tab audio” again and pick a tab to continue. To capture another application, install a virtual audio device (such as VB-Cable on Windows or BlackHole on macOS) and select it as the microphone.
If the room was last used more than an hour ago, the panel asks whether to “Continue previous session” (new captions follow the old ones) or “Start new session” (the old transcript moves to History and you start from a blank page). Choose “Decide later” if you’re not sure; you’ll be asked again when you turn the microphone on.
5. Set translation languages
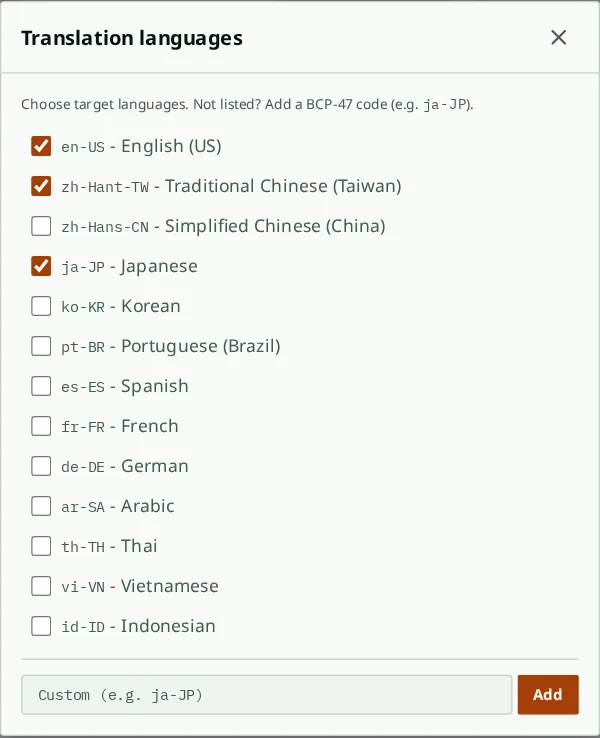
Click “Languages” in the toolbar and tick the languages you want translations in. If a language isn’t listed, type its language code below to add it, for example ko-KR for Korean. How many you can pick depends on your account. Each extra language adds 1 credit per minute.
6. Keywords
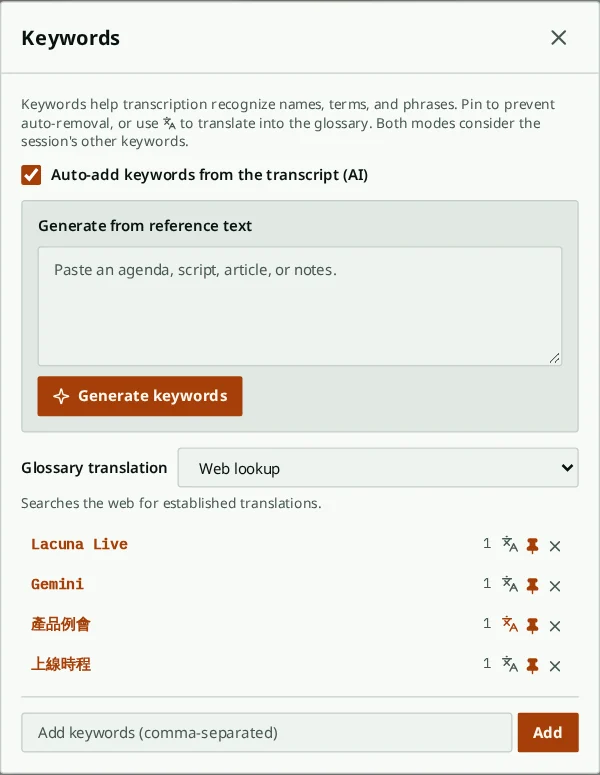
Keywords help the system catch names, company names, and specialist terms. Type them in (separate several with commas), or paste an agenda or script and press “Generate keywords” to pick them out for you.
Each keyword has three buttons on the right: look up its translation and add it to the dictionary, pin it, and delete it. Lookups use “Web lookup” (searches the web for established translations) or “Quick translate” (the AI’s own knowledge: faster, but unverified). Pinned keywords are never removed automatically and also guide speech recognition (from its next connection), and keywords you type yourself are pinned for you.
With “Auto-add keywords from the transcript (AI)” on (the default), the system adds keywords from what the speaker says. The number next to a keyword is its score: +1 for each sentence that mentions it, −1 for each one that doesn’t; unpinned keywords are removed at −100. Turned off, nothing is added automatically, and scoring continues.
7. Dictionary
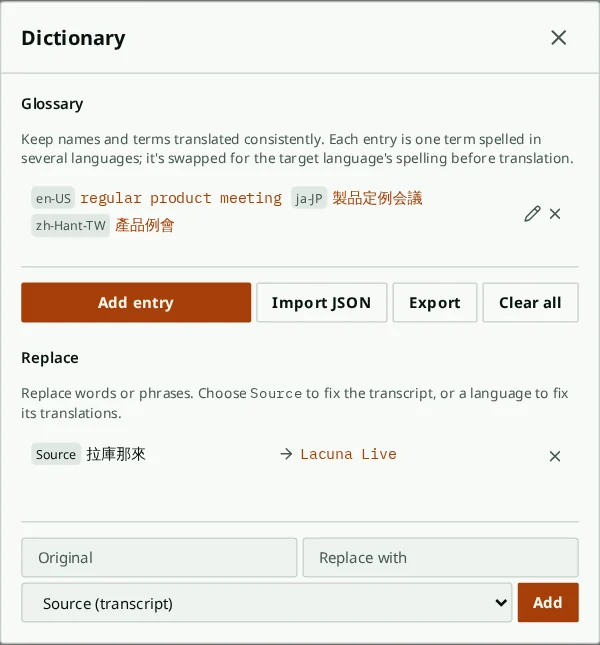
The “Glossary” makes a word translate the same way every time, which suits company and product names. Press “Add entry” and fill in how the word is written in each language (at least two). You can also import or export the whole glossary.
“Replace” swaps one word for another automatically. Choose “Source (transcript)” to fix the original text, or a language to change only that translation. For example, if “Lacuna Live” keeps being heard as “拉庫那來”, add a rule to change it back.
8. Share with viewers
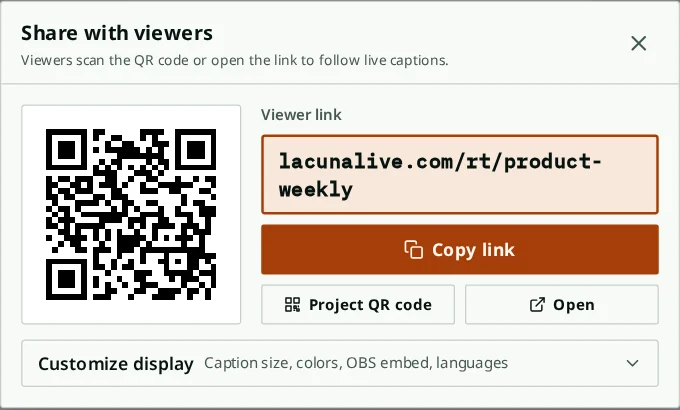
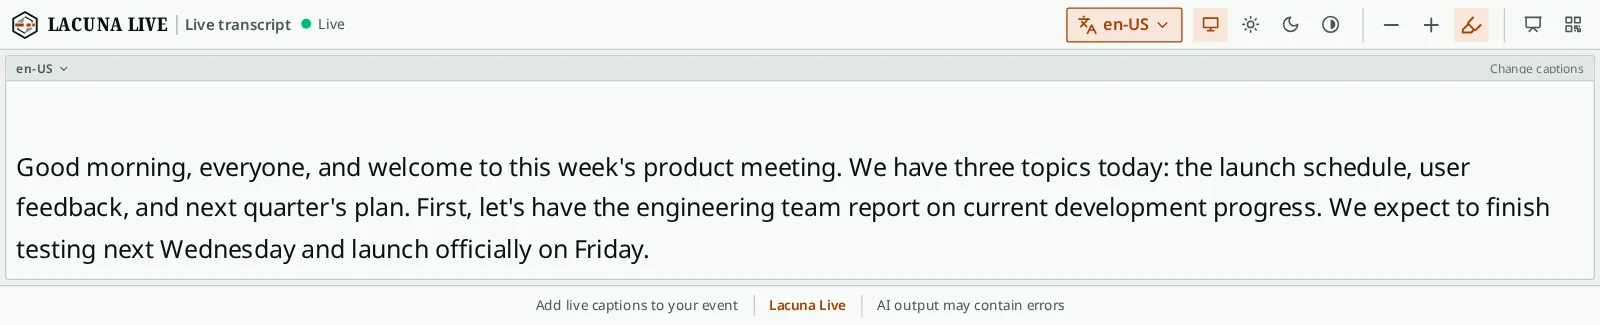
Click “Share link / QR” to see the viewer link and its QR code. Use “Copy link” to send it, or “Project QR code” to open a large QR code window you can drag to a projector for the room to scan. To set the font size, colors, languages, or an OBS embed, expand “Customize display”; the customized link below updates as you go, and the buttons next to it copy it or open it in a new tab to check the result. The preview in the middle of the panel stays as it is. The next section explains each setting.
Viewers don’t need to sign in. They open the link to see captions and can switch languages themselves. You can show one language, several, or all of them; when the room’s languages change, the choices update too.
9. Customize the viewer link
In the “Share link / QR” window, expand “Customize display” and click an option under each setting. The matching parameter is added to the link, so you don’t need to remember any codes. Settings you leave alone keep their defaults.
For the audience, the plain link is usually best: viewers can change the caption size, colors, and language on their own screens. A customized link suits screens with a fixed job, such as a projector in the room, a livestream overlay, or a group that only follows one language.
- font-size
- Caption size. Use values like 32px or 2rem; a plain number means pixels. The default is 1.25rem (about 20px). Projectors and livestreams usually need 40–60px to be readable.
- theme
- Colors: light, dark, or high-contrast. Without it, the page follows the viewer’s light or dark device setting. For a projector, pick one so the screen doesn’t change with the computer’s settings.
- embed
- Set to 1 to show captions only, without the top toolbar, bottom bar, or language labels. Use it in streaming software such as OBS or vMix. Without theme, the background is transparent and the text is white with a dark outline, so it sits directly on top of video; with theme, it gets that theme’s solid background.
- show
- Which languages to show, separated by commas, in the order you list them (for example en-US,ja-JP). Without it, every language shows. With it, translation languages added to the room later won’t appear on this screen.
- ui
- Language of the viewer page’s buttons and menus (zh-Hant, en, or ja); it doesn’t change the caption language. Without it, the page follows the viewer’s browser and falls back to English.
Example links (try them on the demo screen; they open in a new tab)
- Room projector: Chinese and English side by side, high contrast, interface in Englishhttps://lacunalive.com/rt-demo?show=zh-Hant-TW,en-US&theme=high-contrast&font-size=40px&ui=en
10. Use with OBS and other streaming software
To overlay captions on a livestream or recording, use a customized link with embed=1. In OBS:
1. Under “Customize display”, choose “1” for embed, one language for show, and a larger font-size (for example 48px). Then copy the customized link.
2. In OBS, click “+” under Sources, add a “Browser” source, and paste the link into the URL field.
3. Set the width to match your canvas (for example 1920) and the height to fit the lines you want (for example 300). Then drag the source to the bottom of the scene.
4. To show two languages at once, add one Browser source per language, each with its own show value, and place them separately.
Without theme, the background is transparent and the white, outlined text stays readable over any video. For a caption bar with a solid background, add theme=dark. In vMix, add a Web Browser input and use the same link. If the network drops, the captions reconnect on their own.
Example links (try them on the demo screen; they open in a new tab)
- OBS transparent captions (English)https://lacunalive.com/rt-demo?embed=1&show=en-US&font-size=48px
- OBS dark caption bar (Japanese)https://lacunalive.com/rt-demo?embed=1&show=ja-JP&font-size=48px&theme=dark
11. Read aloud and screen sharing
Two buttons at the top right of the viewer screen work only on the device where you press them. Other viewers are not affected.
- Read captions aloud
- Reads finished sentences aloud with this device’s built-in voice, in the first language shown on screen. If the device has no voice for that language, a notice appears above the captions.
- Share screen with captions
- Available only in desktop browsers. Press it and pick a window or screen to share, such as your slides. The tab switches to presentation mode: captions on top, the shared screen below, and on the right a QR code for the room to scan plus the available languages. The right side also lets you change the caption language, caption size, and colors, switch the shared source, or stop presenting. Project this tab so the room sees your slides and captions together. The shared screen is shown only on this device; it isn’t uploaded or sent to other viewers. Read aloud turns off when sharing starts.
12. Correct captions
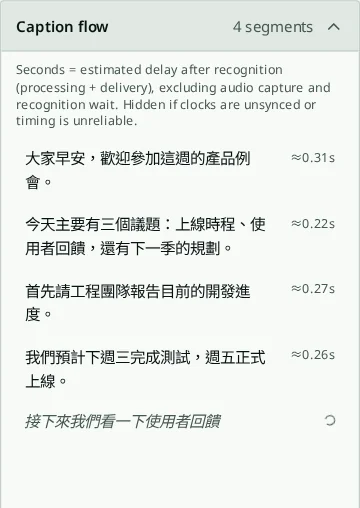
“Caption flow” on the right lists what the speaker has said. Gray italic text is a sentence still being recognized; the rest are finished sentences. The number on the right is how many seconds the sentence took to reach the screen after it was recognized.
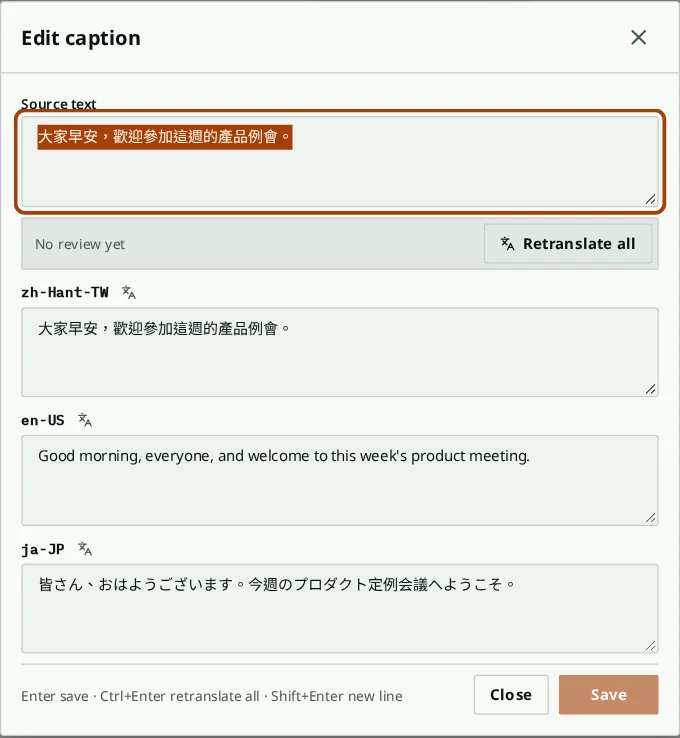
Click a finished sentence to edit the original text and each translation; press “Save” and viewers see the change right away. If you changed the original and want new translations, press “Retranslate all” to redo every language, or the translate icon next to one language to redo just that one. Retranslated text only takes effect after you press “Save”.
For some sentences the edit window shows “Original transcript”, the recognition result before AI correction. If the correction got it wrong, press “Use transcript”. When it warns that correction may have dropped the marked text, compare the two.
The three small cells to the right of a sentence are its translation review: the top cell is omission, the bottom two are addition and mistranslation. Green means no issues, amber a doubt with a passing score, and orange a low score. A low-scoring translation is retranslated automatically and replaced only if the new one scores higher. Open the sentence to see each language’s score.
When you scroll up to read earlier sentences, new captions won’t push them away. Press “Latest” or scroll back to the bottom to follow new captions again.
A sentence still being recognized can’t be edited. If a word keeps being misheard, click the gray italic sentence, select the wrong text, and enter the right spelling; later sentences are fixed automatically, the same as a “Replace” rule in the dictionary. If that sentence was finished before you added the rule, it is retranslated with it; earlier sentences are not changed.
If the speaker never pauses and a sentence keeps growing, press “Send current sentence” when you hear a sentence end. That sentence is finished right away and its translation starts.
When the event is over, turn the microphone off and press “End session”. The transcript moves to History on “My sessions”, where you can edit and download it. The room is cleared for next time; the viewer link and settings stay the same.
13. Co-owners
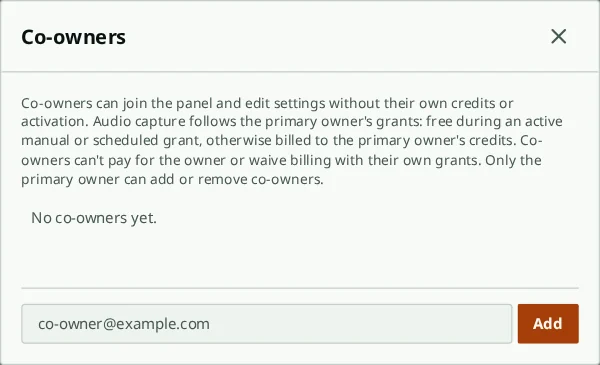
To let others run the panel with you, enter their email under “Co-owners”. Once they sign in they can operate the panel and change settings; usage is still paid from the room creator’s credits.
Only the room’s creator can add or remove co-owners. A removed co-owner can no longer open the room, and the KEY is replaced with a new one.